LATEST 1-2-2018 VEr.1.8.1
_______

__________________
If you'd like to see how
"I" view the world
Take a look at my
"Personal" Website
__________________
LATEST N E W S
__________________
 Jan 2017
NEW 2017 Edition
Mr Scanner CD released
_________________
April 2016
NEW 2016 Edition
Mr Scanner CD released
 July 2015
Added new Youtube Video tutorial for how to use new "Radio Reference Frequency Manager"
![]() April 2015
April 2015
Added support for latest Uniden Phase II Scanners
BCD996P2 and BCD325P2»
![]() March 2015
March 2015
New release of Scancat-Lite-Plus with Completely new menu driven database support for Radio Reference
Dec2014
Added support for Unden BCD536HP and BCD436HP Unidens New "Home Patrol Units"
These are the steps used to view and repair Commports in Windows XP
The screen shots are reduced in size to fit on this tutorial,
so click on any image to see it full size.
STEP 1 STEP 2 STEP 3
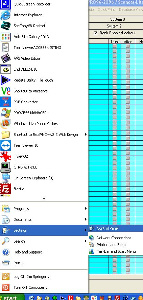
STEP 1 - CLICK ON START AND THEN CHOOSE "CONTROL PANEL"
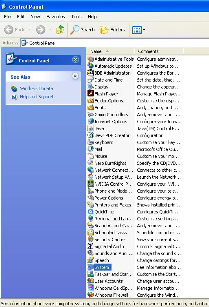
STEP 2 - IN CONTROL PANEL CLICK ON "SYSTEM"
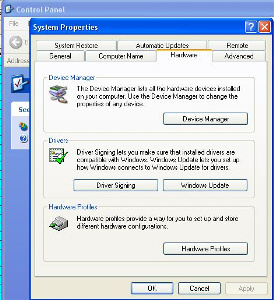
STEP 3 - IN THE SYSTEM MENU CHOOSE "HARDWARE TAB", AND THEN CHOOSE "DEVICE MANAGER'

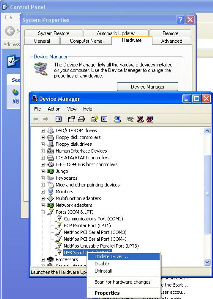
STEP 4 STEP 5 STEP 6
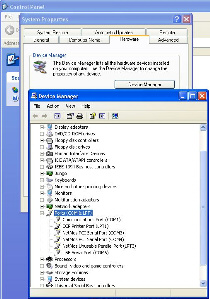
STEP 4 - OPEN THE "PORTS" BY CLICKING ON THE "PLUS SIGN" TO LEFT OF "THE PORTS
STEP - 5 nOTICE THAT AT THE VERY BOTTOM, THREE IS A COMM PORT #6
STEP 6 - REMOVE USB/COMMPORT CABLE AND NOTICE THAT COMMPORT # 6 HAS VANISHED.
THIS INDICATES THAT MOST LIKELY #6 IS THE USB CABLE YOU WANT TO USE FOR YOUR SCANNER
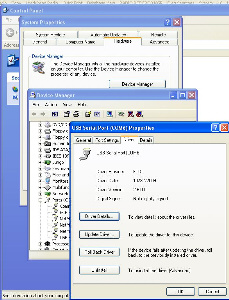
STEP 7
STEP #7 - IF FOR ANY REASON THERE IS AN "ERROR FLAG", ON THAT PORT
YOU CAN RIGHT CLICK ON THE SUSPECT PORT TO GET THIS SCREEN